Introduction
Integrating an OpenAI assistant into your WordPress website can enhance user interaction by providing automated, intelligent responses to inquiries, and more. This short guide outlines how to create an OpenAI assistant and incorporate it into your site using the Kognetiks Chatbot for WordPress plugin.
Step 1: Create Your OpenAI Assistant
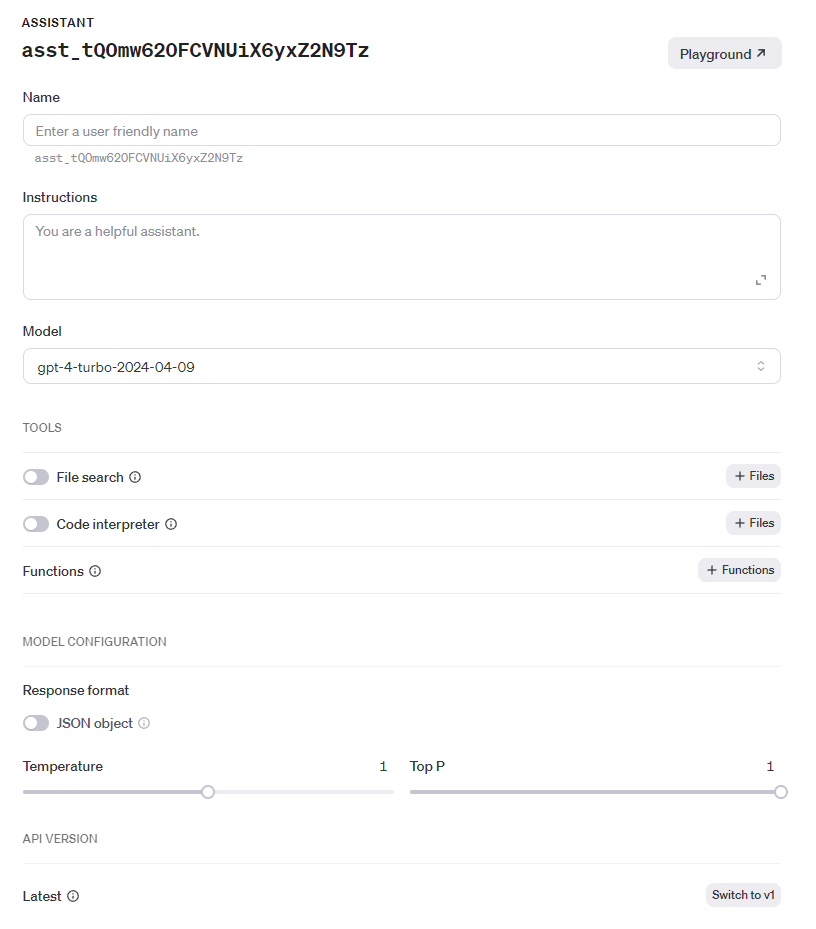
- Start by Creating an Assistant:
- Visit the OpenAI platform at OpenAI Assistants.
- Click the “Create” button in the upper right corner.
- Enter a name for your assistant and specify the instructions it should follow, i.e., the purpose of the assistant. For instance, if your assistant will handle financial queries, mention that it should only comment on “financials”.
- Select the OpenAI model. It’s recommended to use the latest model for optimal performance, such as gpt-4-turbo-2024-04-09, but there are other choices. A full list of the models and their capabilities can be found in the OpenAI documentation.
- Upload any helper files your assistant might need, such as pricing sheets, information and specification sheets, and the like.
- Saved As You Go:
- The assistant should save your work as you go. You can check that it has saved any changes you make by examining the update date/time in the lower left corner of the assistant.

Step 2: Test Your Assistant
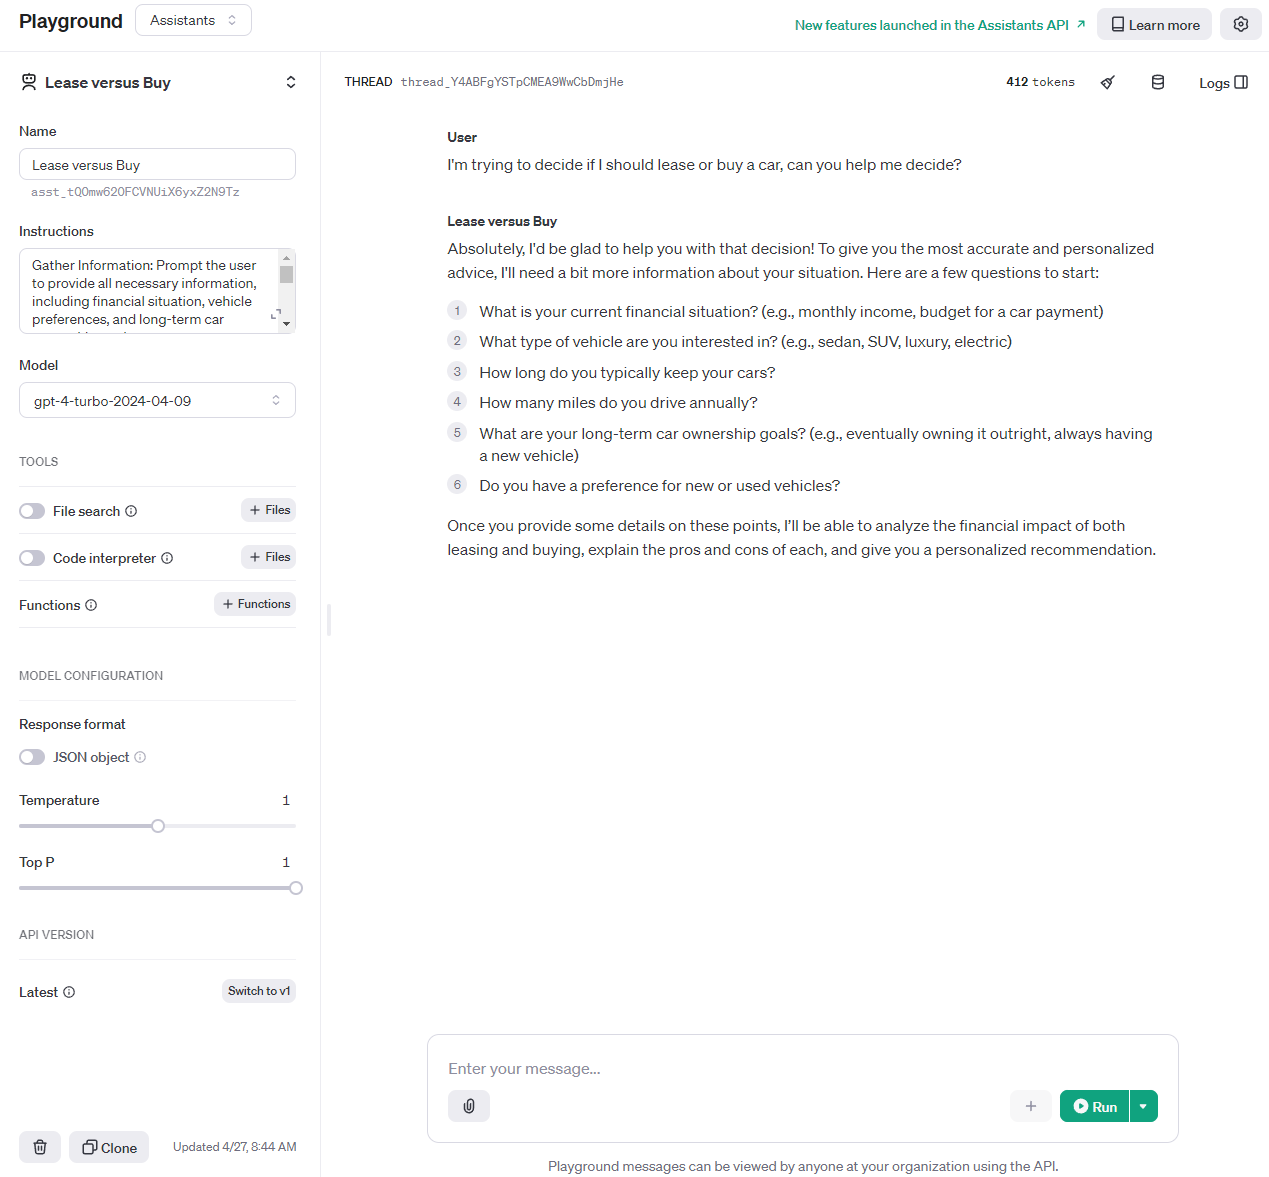
- Testing in Playground:
- Before integration with your website, test your assistant in the OpenAI Playground to ensure it responds accurately to the type of queries it will encounter on your website. You can access the Playground by clicking the button in the upper right corner.
- Copy the identifier for the assistant, as it will be required for integration. It will appear in the format asst_tQ0mw62OFCVNUiX6yxZ2N9Tz. This is your assistant id.

Step 3: Integrate with Your Website
- Choose Integration Style:
- Decide whether you want the chatbot to appear in a floating style or as an embedded element on your site.
- Add to Your Website:
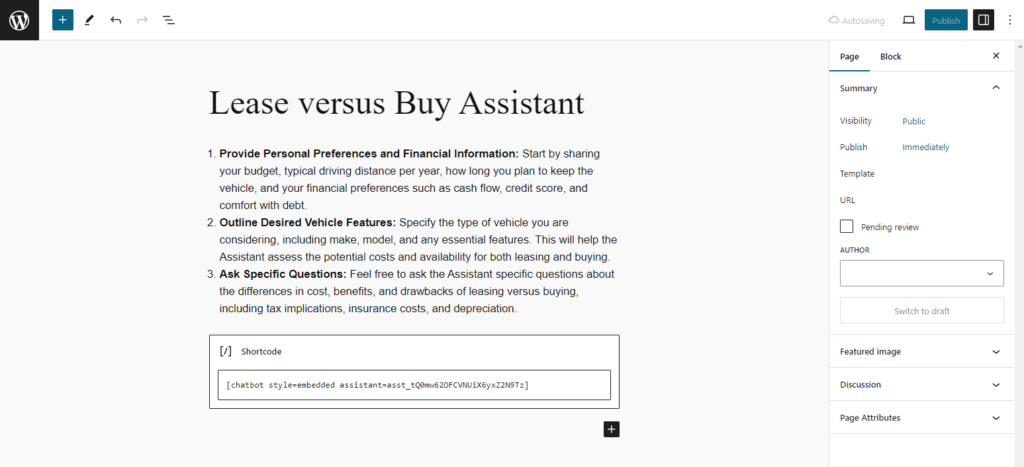
- Use the appropriate shortcode for your chosen style, replacing the placeholder assistant ID with the one you copied earlier:
- Floating style: chatbot style=floating assistant=asst_yourAssistantID
- Embedded style: chatbot style=embedded assistant=asst_yourAssistantID
- Use the appropriate shortcode for your chosen style, replacing the placeholder assistant ID with the one you copied earlier:

Step 4: Validate Integration
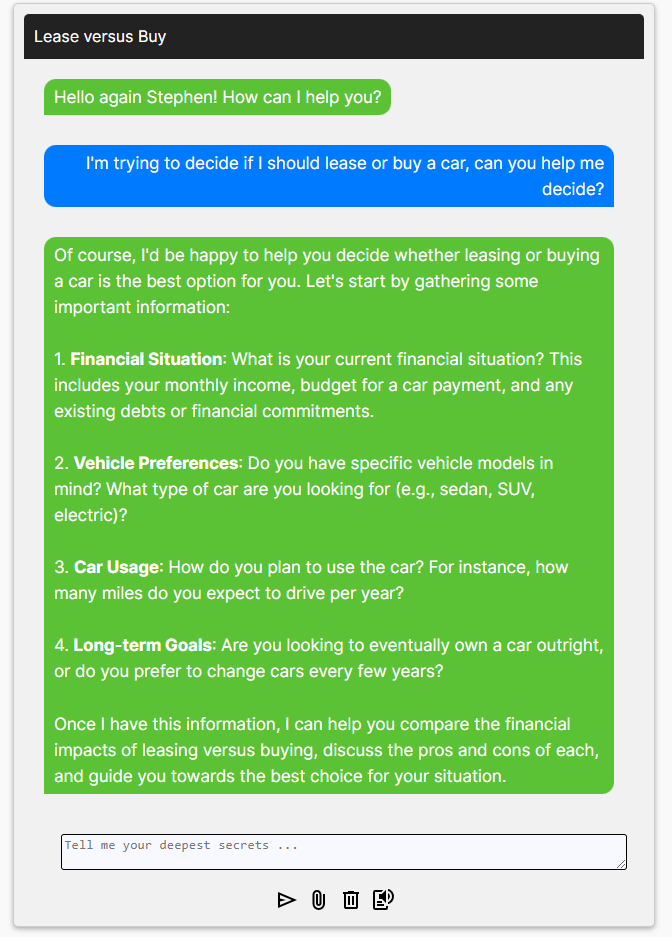
- Test on Your Website:
- After integration, visit your website to ensure the chatbot is functioning. Test it with various queries to confirm it responds as expected.
- Note: Please be aware that the responses generated by the assistant can vary based on the input provided and the specific configuration settings of the assistant. Always consider refining and testing the assistant to ensure it meets your specific needs and expectations.

Final Thoughts
Integrating an OpenAI assistant into your WordPress website using the Kognetiks Chatbot for WordPress plugin can significantly improve user engagement and streamline interactions. Ensure that you thoroughly test and adjust the instructions you’ve given your assistant as needed.
By following these steps, you can effectively set up and utilize an AI-driven chatbot to enhance your website’s capabilities.
#OpenAI #WordPress #Chatbot #WordPressPlugins
About the Author
Stephen Howell is a multifaceted expert with a wealth of experience in technology, business management, and development. He is the innovative mind behind the cutting-edge AI powered Kognetiks Chatbot for WordPress plugin. Utilizing the robust capabilities of OpenAI’s API, this conversational chatbot can dramatically enhance your website’s user engagement. Visit Kognetiks Chatbot for WordPress to explore how to elevate your visitors’ experience, and stay connected with his latest advancements and offerings in the WordPress community.


Leave a Reply
You must be logged in to post a comment.